Cloud Storage Installation and configuration

Avatar
  • Moderator
  • Total Posts: 85

Support

1. extract the  version of the Cloud Storage plugin.
2. copy the plugin folder into your "nopCommerce\Plugins" directory.
3. login as admin
4. reStart nopCommerce application.
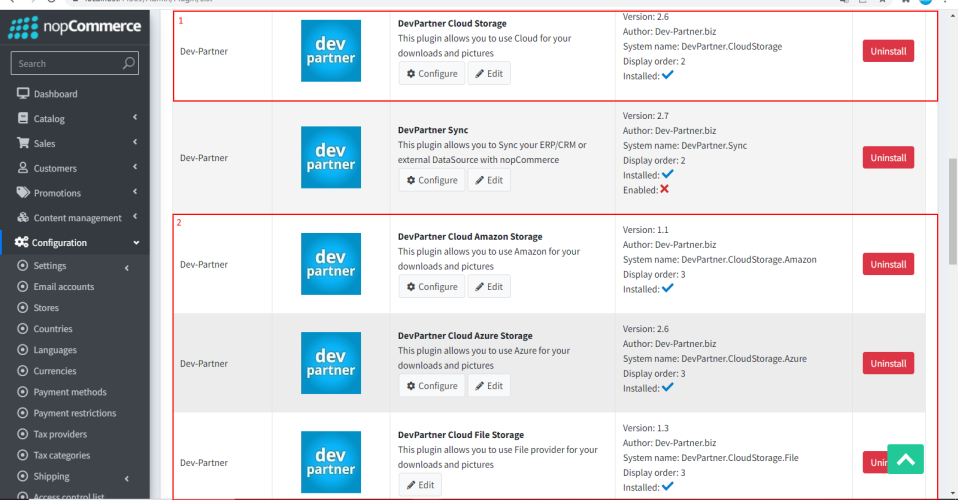
5. go to admin area->configuration->Plugins
6. install the plugins from your admin panel

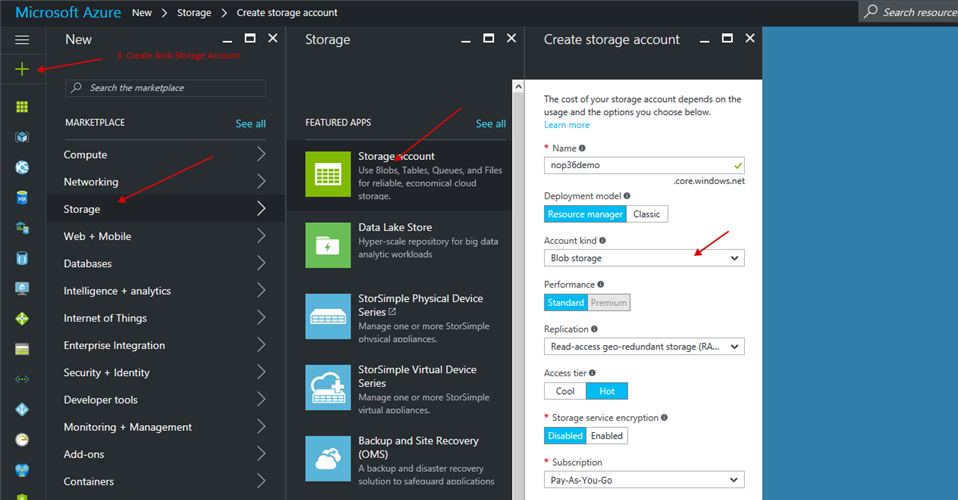
7. Create Blob Storage Account

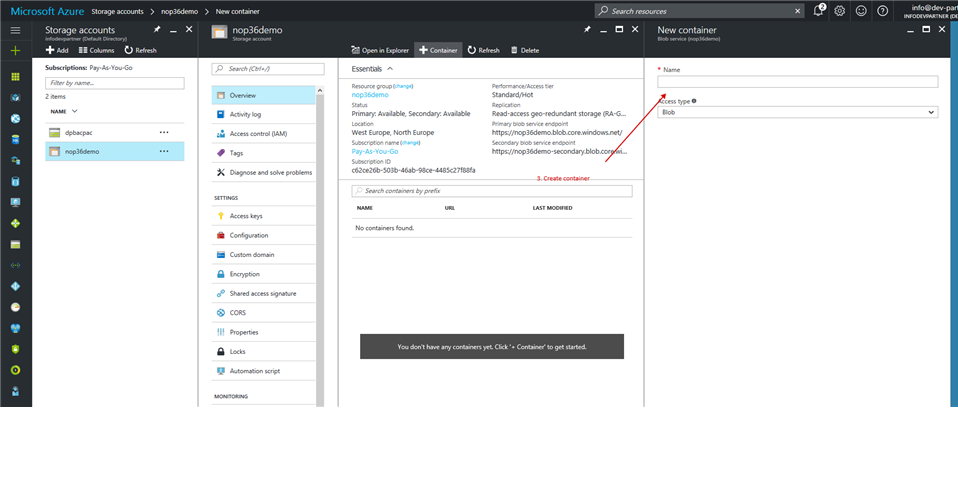
8. Create Container for pictures

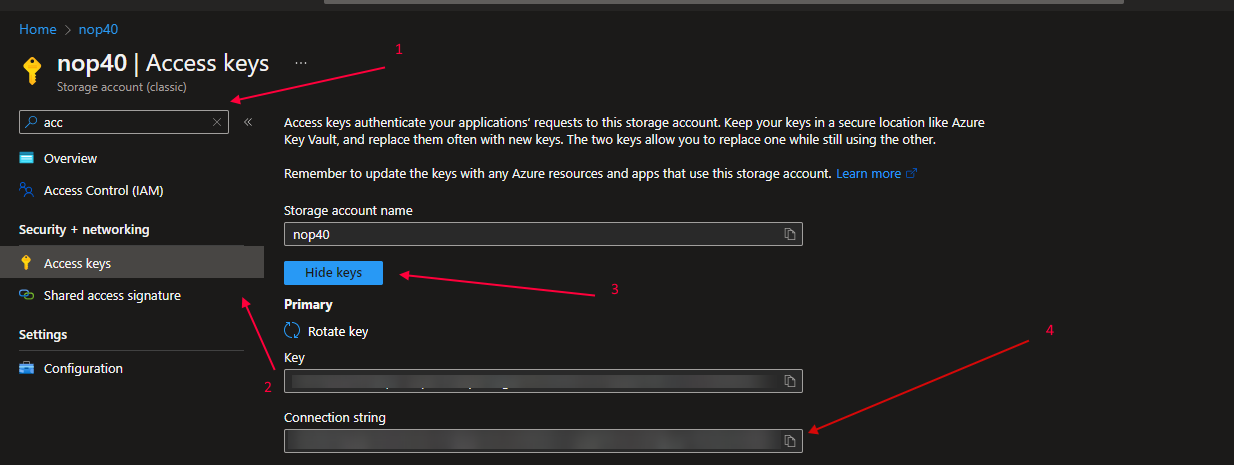
9. Copy Azure Blob Connection String

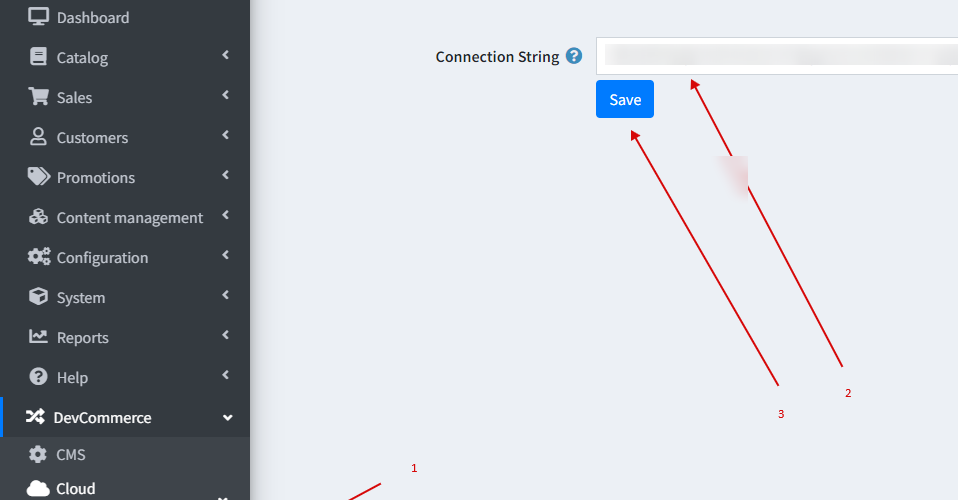
10. Insert Connection String

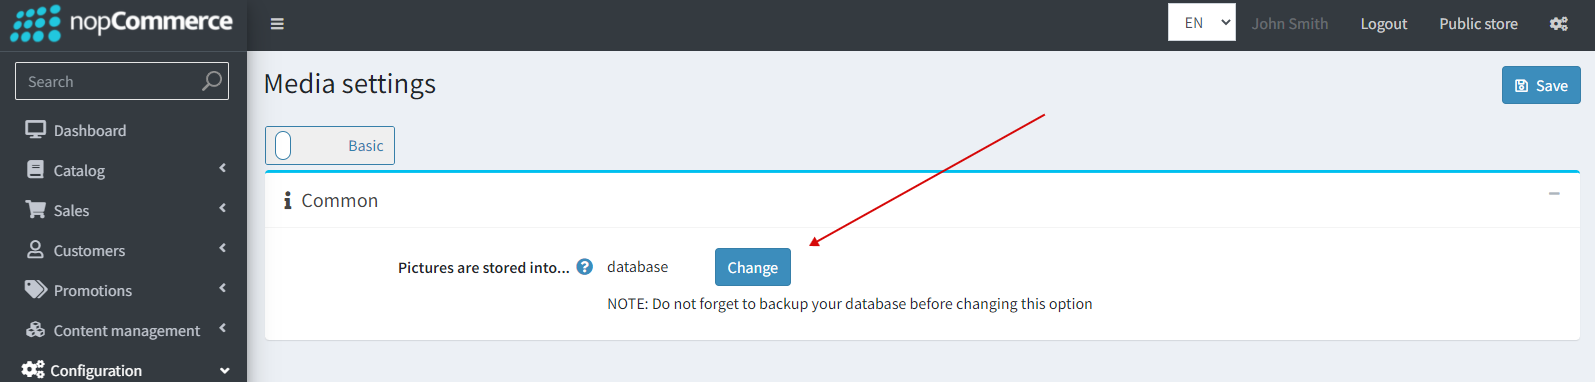
11. Move your pictures to DB

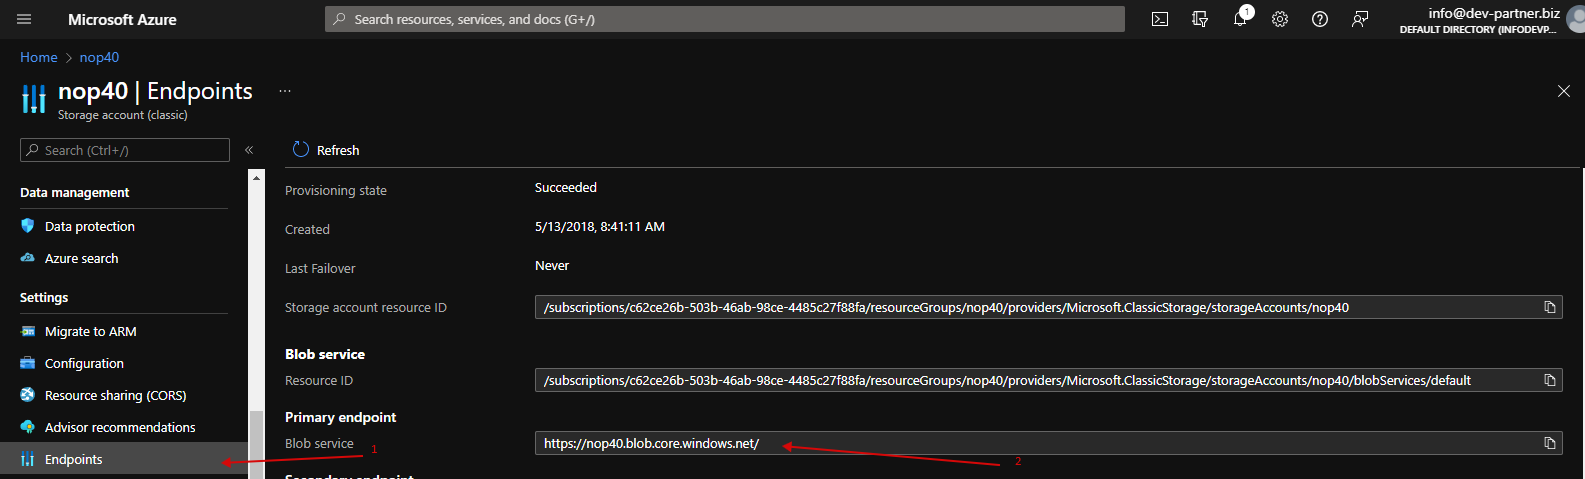
12. Copy Endpoint(Blob or CDN)

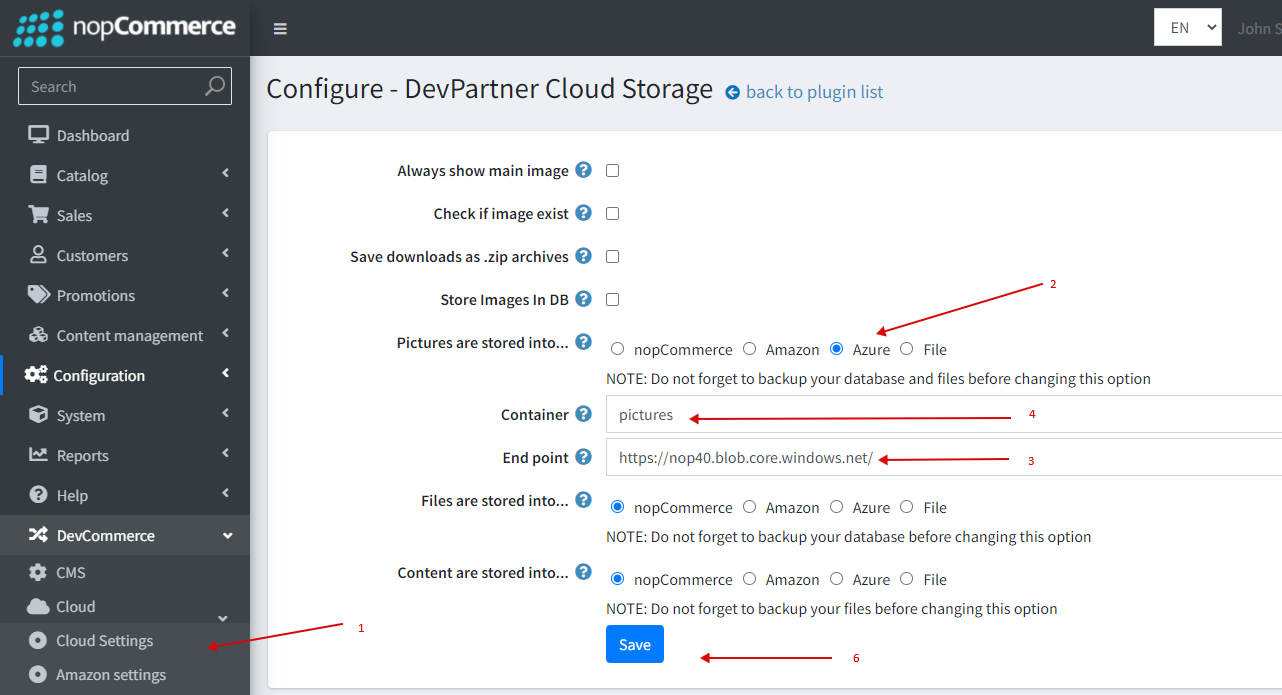
13. Choose Azure provider for pictures and set container name and your Endpoint(with "\" at the end). Click Save button

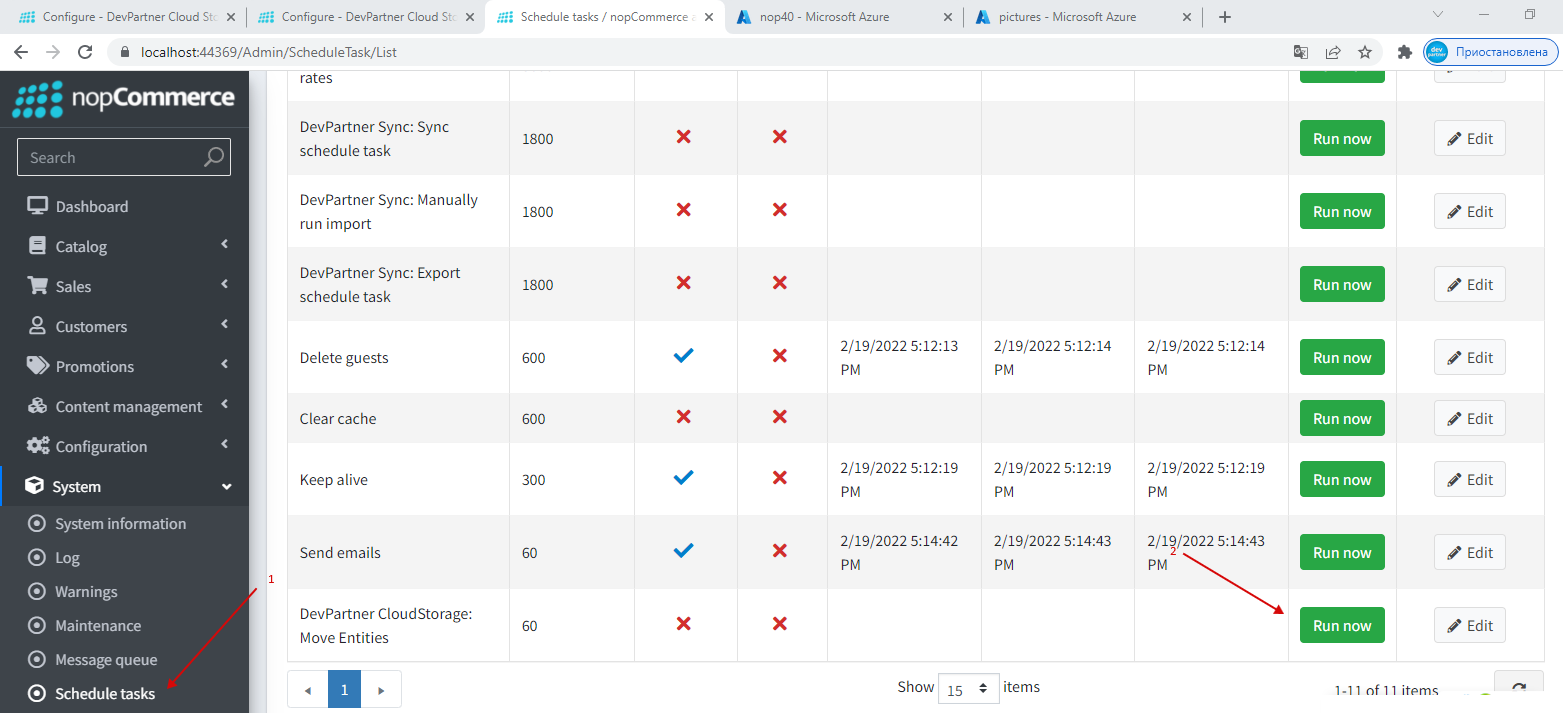
14. Run Schedule task to move your pictures

15. Move your pictures to Filesysem(DB)

Avatar
  • Total Posts: 1

Greg

AWS installation (nop 4.3).

1) Create an IAM user with programmatic access and take note of access key and secret key
2) Create S3 bucket and allow public access
3) Add a bucket policy that grants access for GetObject
4) Install the DevPartner.CloudStorage plugin
5) Install the DevPartner.CloudStorage.Amazon plugin
6) Check that the stored procedure DP_Cloud_SaveAllPictures exists. If it doesn't, obtain it from DevPartner and create it
7) In the admin area, open DevCommerce - Amazon Settings and enter the AccessKey, SecretKey and Region.
8) In the admin area, open DevCommerce - Cloud Settings, change the storage location to Amazon and enter the bucket name.
Note: Ignore the error - Could not change picture storage type before the moving completed. This is triggered even when the settings are updated correctly.
9) Go to System, Scheduled Tasks. Enable the task - DevPartner CloudStorage: Move Entities
10) Optional - create a cloudfront distribution for the S3 bucket and enter the domain in the plugin Amazon settings.

Hope this helps someone