- Blog
- Sitecore for marketing specialist
Simplified Guide to Integrating Sitecore Engage SDK Script for Enhanced Website Personalization
- 10:52:08 PM
- Friday, December 01, 2023
In today's digital landscape, delivering a personalized user experience is paramount for any website looking to engage its audience effectively. Sitecore, a renowned customer experience management company, offers the Engage SDK, a powerful tool that enables seamless integration for enhanced website personalization.
If you're eager to incorporate the Sitecore Engage SDK script into your website but are unsure where to begin, this comprehensive walkthrough will guide you step-by-step through the integration process.
Step 1: Gather Required Details
Before initiating the integration process, gather essential details:
- Obtain your Client Key from your Sitecore account.
To find your client key, in Sitecore Personalize, on the navigation pane, click > .Company information > Client key
- Create a Point of Sale within your Sitecore account.
For detailed instructions, refer to the Collect Required Details documentation.
Step 2: Loading the SDK Script
- Obtain the Latest Version: Visit the Sitecore Engage SDK Release Notes to fetch the latest version number.
- Inject the Script Tag into your HTML.
var s = document.createElement("script");
s.type = "text/javascript";
s.async = true;
s.src = "https://d1mj578wat5n4o.cloudfront.net/sitecore-engage-v.1.4.2.min.js";
var x = document.querySelector("script");
x.parentNode.insertBefore(s, x);
Step 3: Initializing the Engage SDK
After the script is loaded, initialize the Engage SDK with specific settings.
s.addEventListener("load", async () => {
var settings = {
clientKey: "",
targetURL: "",
pointOfSale: "",
cookieDomain: "",
cookieExpiryDays: 365,
forceServerCookieMode: false,
includeUTMParameters: true,
webPersonalization: false /* boolean or object. See Settings object for all options. Default: false */
};
engage = await window.Engage.init(settings);
// Send a VIEW event
// ...
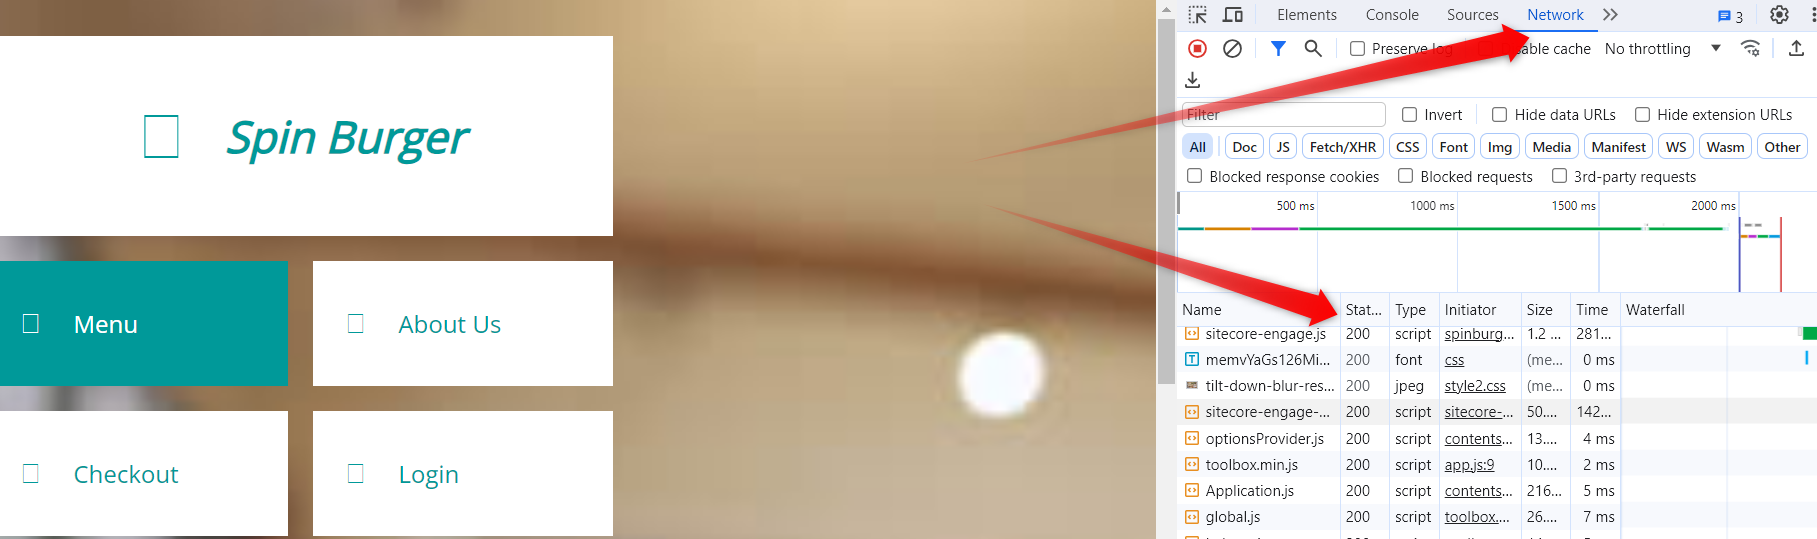
}); Step 4: Verify Script Loading
Ensure that the script successfully loads on your website.
Step 5: Sending a VIEW Event
To trigger a VIEW event and enable testing/debugging.
// Get the pathname (URL after the domain)
const pathName = window.location.pathname;

// Get the search parameters (query string)
const queryString = window.location.search;

// Construct the URL without the domain
const urlWithoutDomain = pathName + queryString;

// Display the URL without the domain in the console
console.log('URL Without Domain:', urlWithoutDomain);

// Send a VIEW event
// ...

var event = {
    channel: "WEB",
    language: "EN",
    currency: "USD",
    page: urlWithoutDomain
};
// Send VIEW event
engage.pageView(event);
// For testing and debugging purposes only
console.log("Copy-paste the following line into Sitecore CDP > Guests > Search field:");
console.log("bid:", engage.getBrowserId());
Step 6: Verify Event Transmission
Check that the event was sent in the browser console.

Step 7: Verify Event in Sitecore CDP
- Find Guest using bid: Use the bid from your browser console to search for your guest in Sitecore CDP.
- Check Event: Ensure that you can see the event associated with your guest in Sitecore CDP.

Step 8: Troubleshooting (if necessary)
If you encounter issues with the bid (browser ID) not appearing in the console output, refer to the Troubleshooting documentation for guidance.
By following these steps meticulously, you'll seamlessly integrate the Sitecore Engage SDK script into your website, paving the way for elevated levels of website personalization and enhanced user engagement.
Remember, personalized user experiences are the cornerstone of successful digital interactions, and leveraging tools like the Sitecore Engage SDK empowers you to craft these experiences effectively.